Setup Guide: 30cm Double Rod Kit

What's in the box

Your VESA kit includes all the necessary screws and tools to fit it on most common monitor arms and monitors. Choose the right monitor stud/spacer combination depending on your monitor back's design features to provide the right clearance for a your extension rods.

Your Double Rod kit includes all the necessary parts and tools to add it your monitor rig. It gives you immense mounting flexibility as rod clamps and cheese plates can be re-arranged according to your preferences. 

STEP 1: Attach your rods

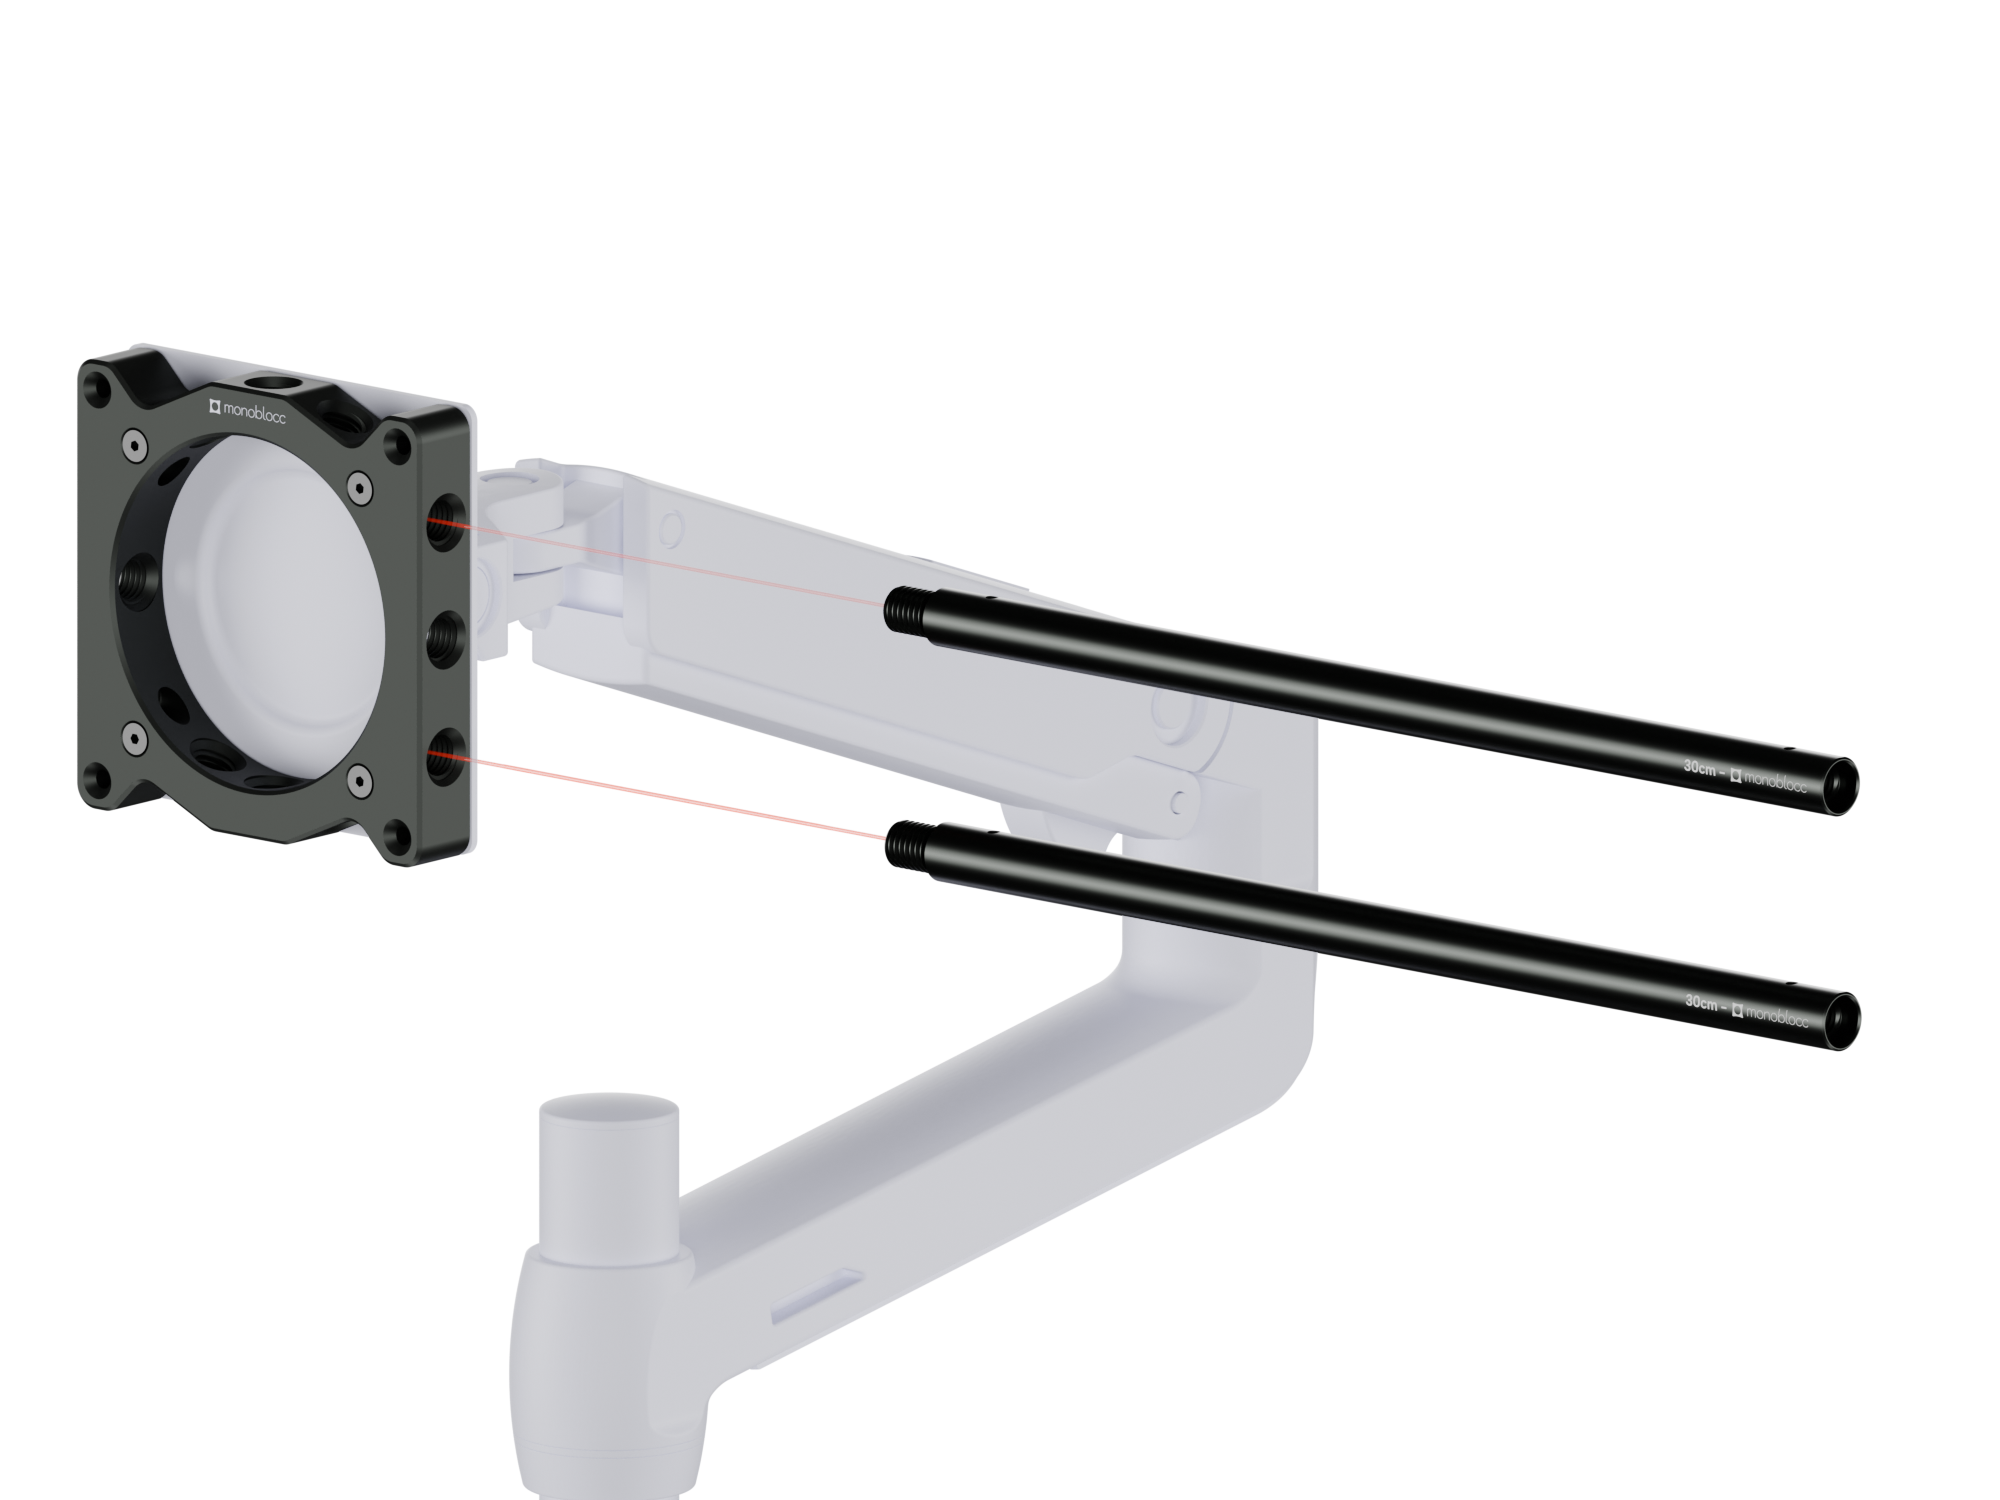
Screw your included rods into a double rod side of your VESA plate. A double rod side is one where all rod openings are perpendicular to each other. 

Screw your included rods into a double rod side of your VESA plate. A double rod side is one where all rod openings are perpendicular to each other. 

STEP 2: Attach the end caps

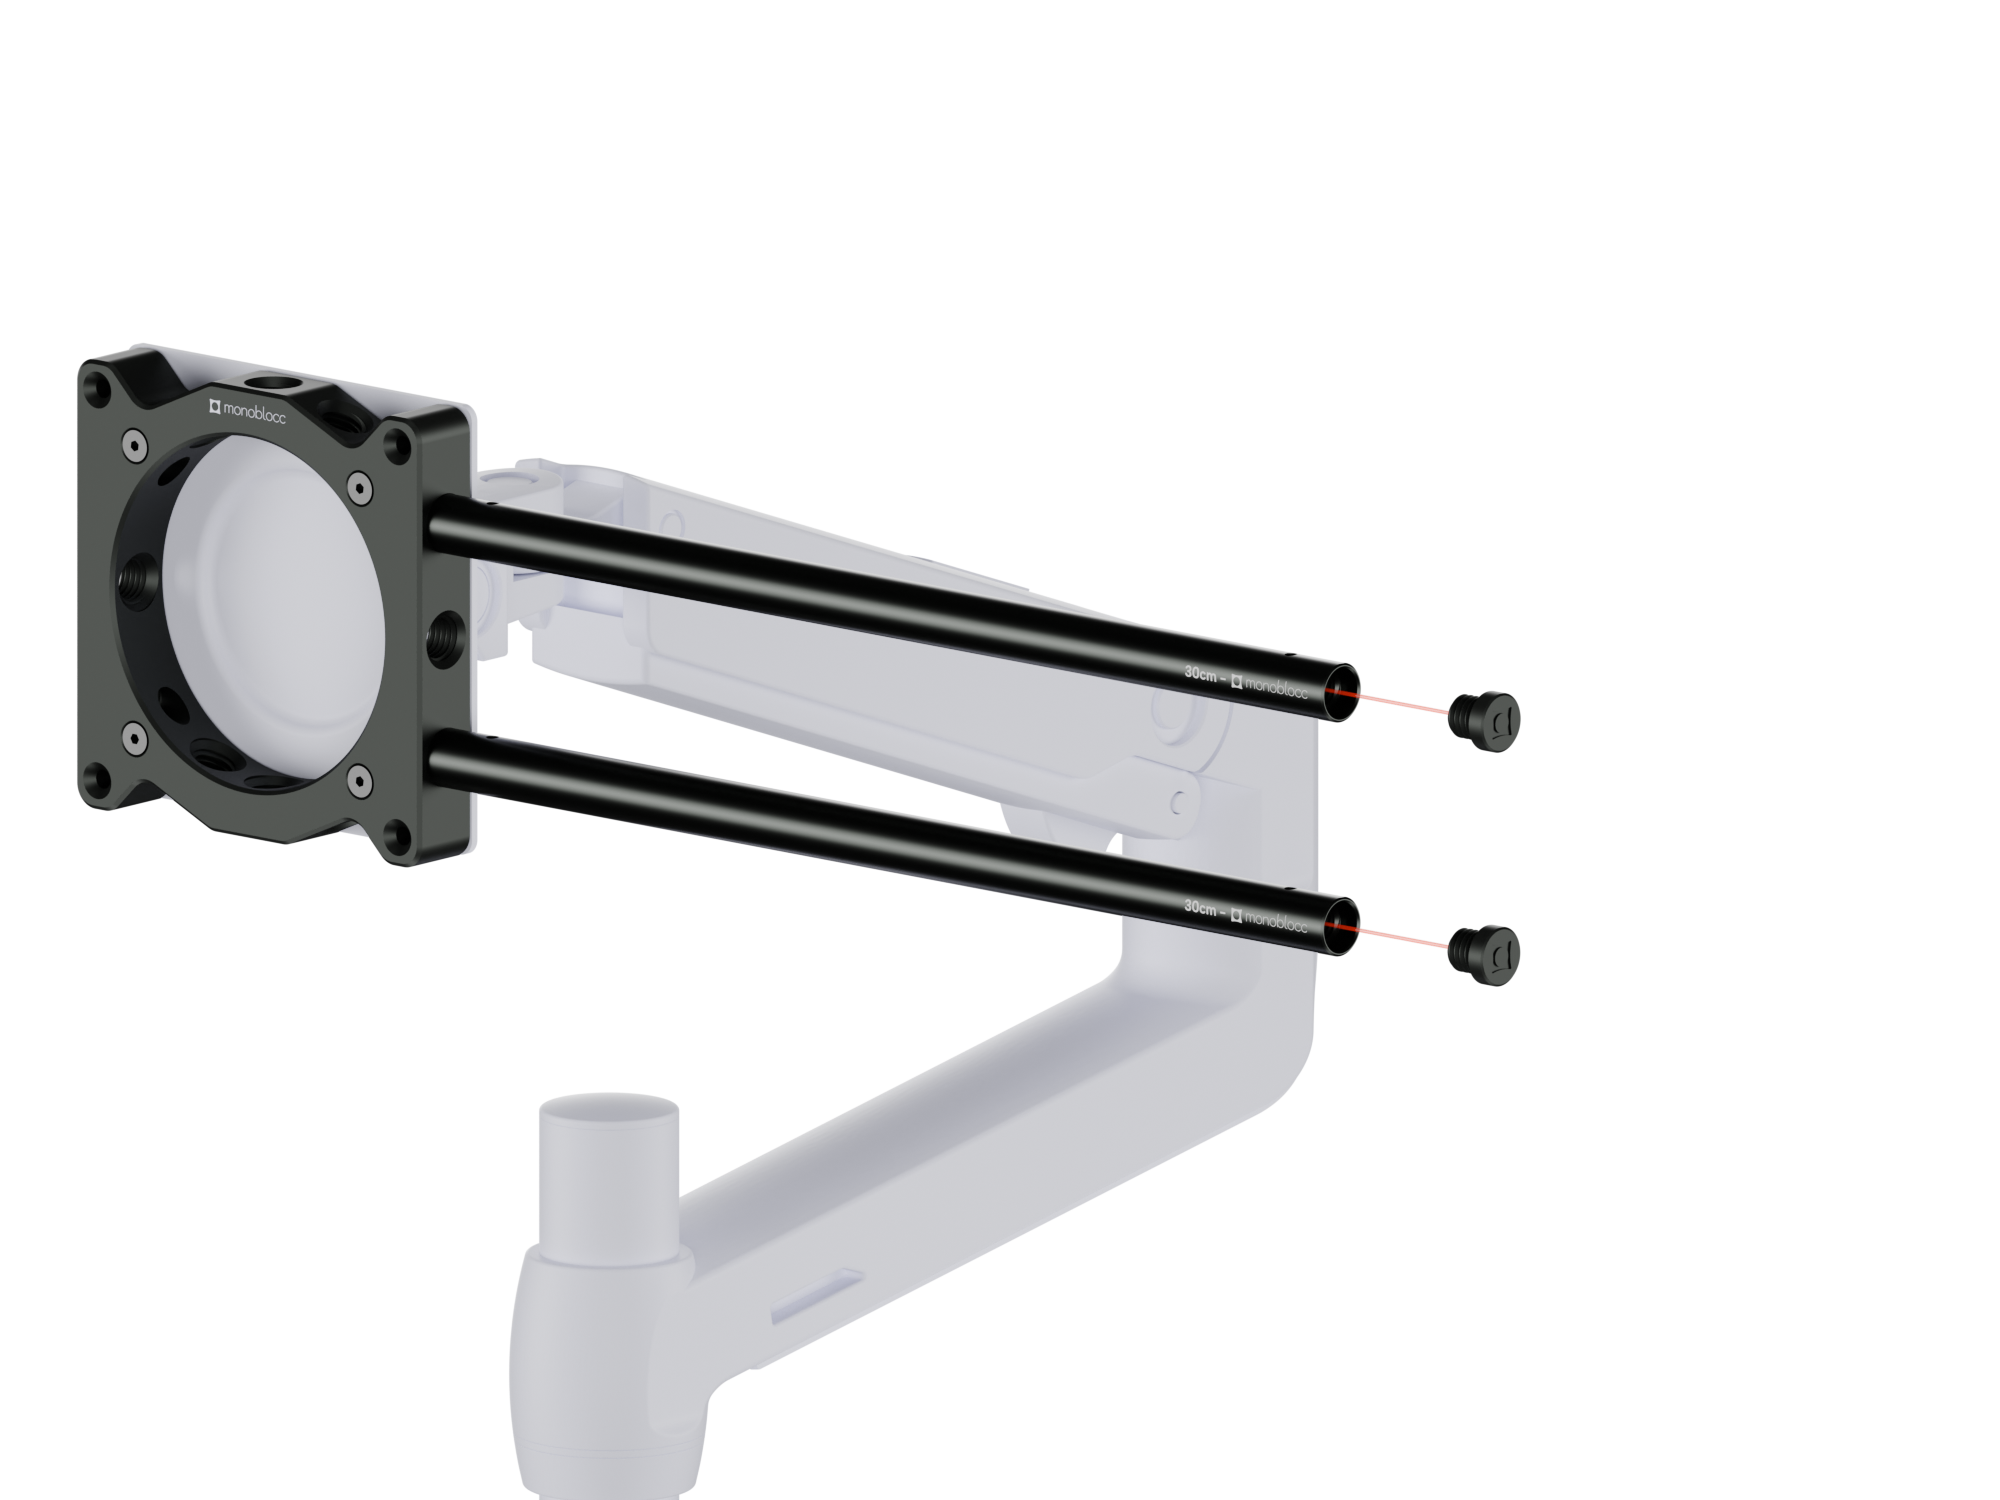
Add the the supplied end caps to your rod ends.

Add the the supplied end caps to your rod ends.

STEP 3: Add your rod clamps 

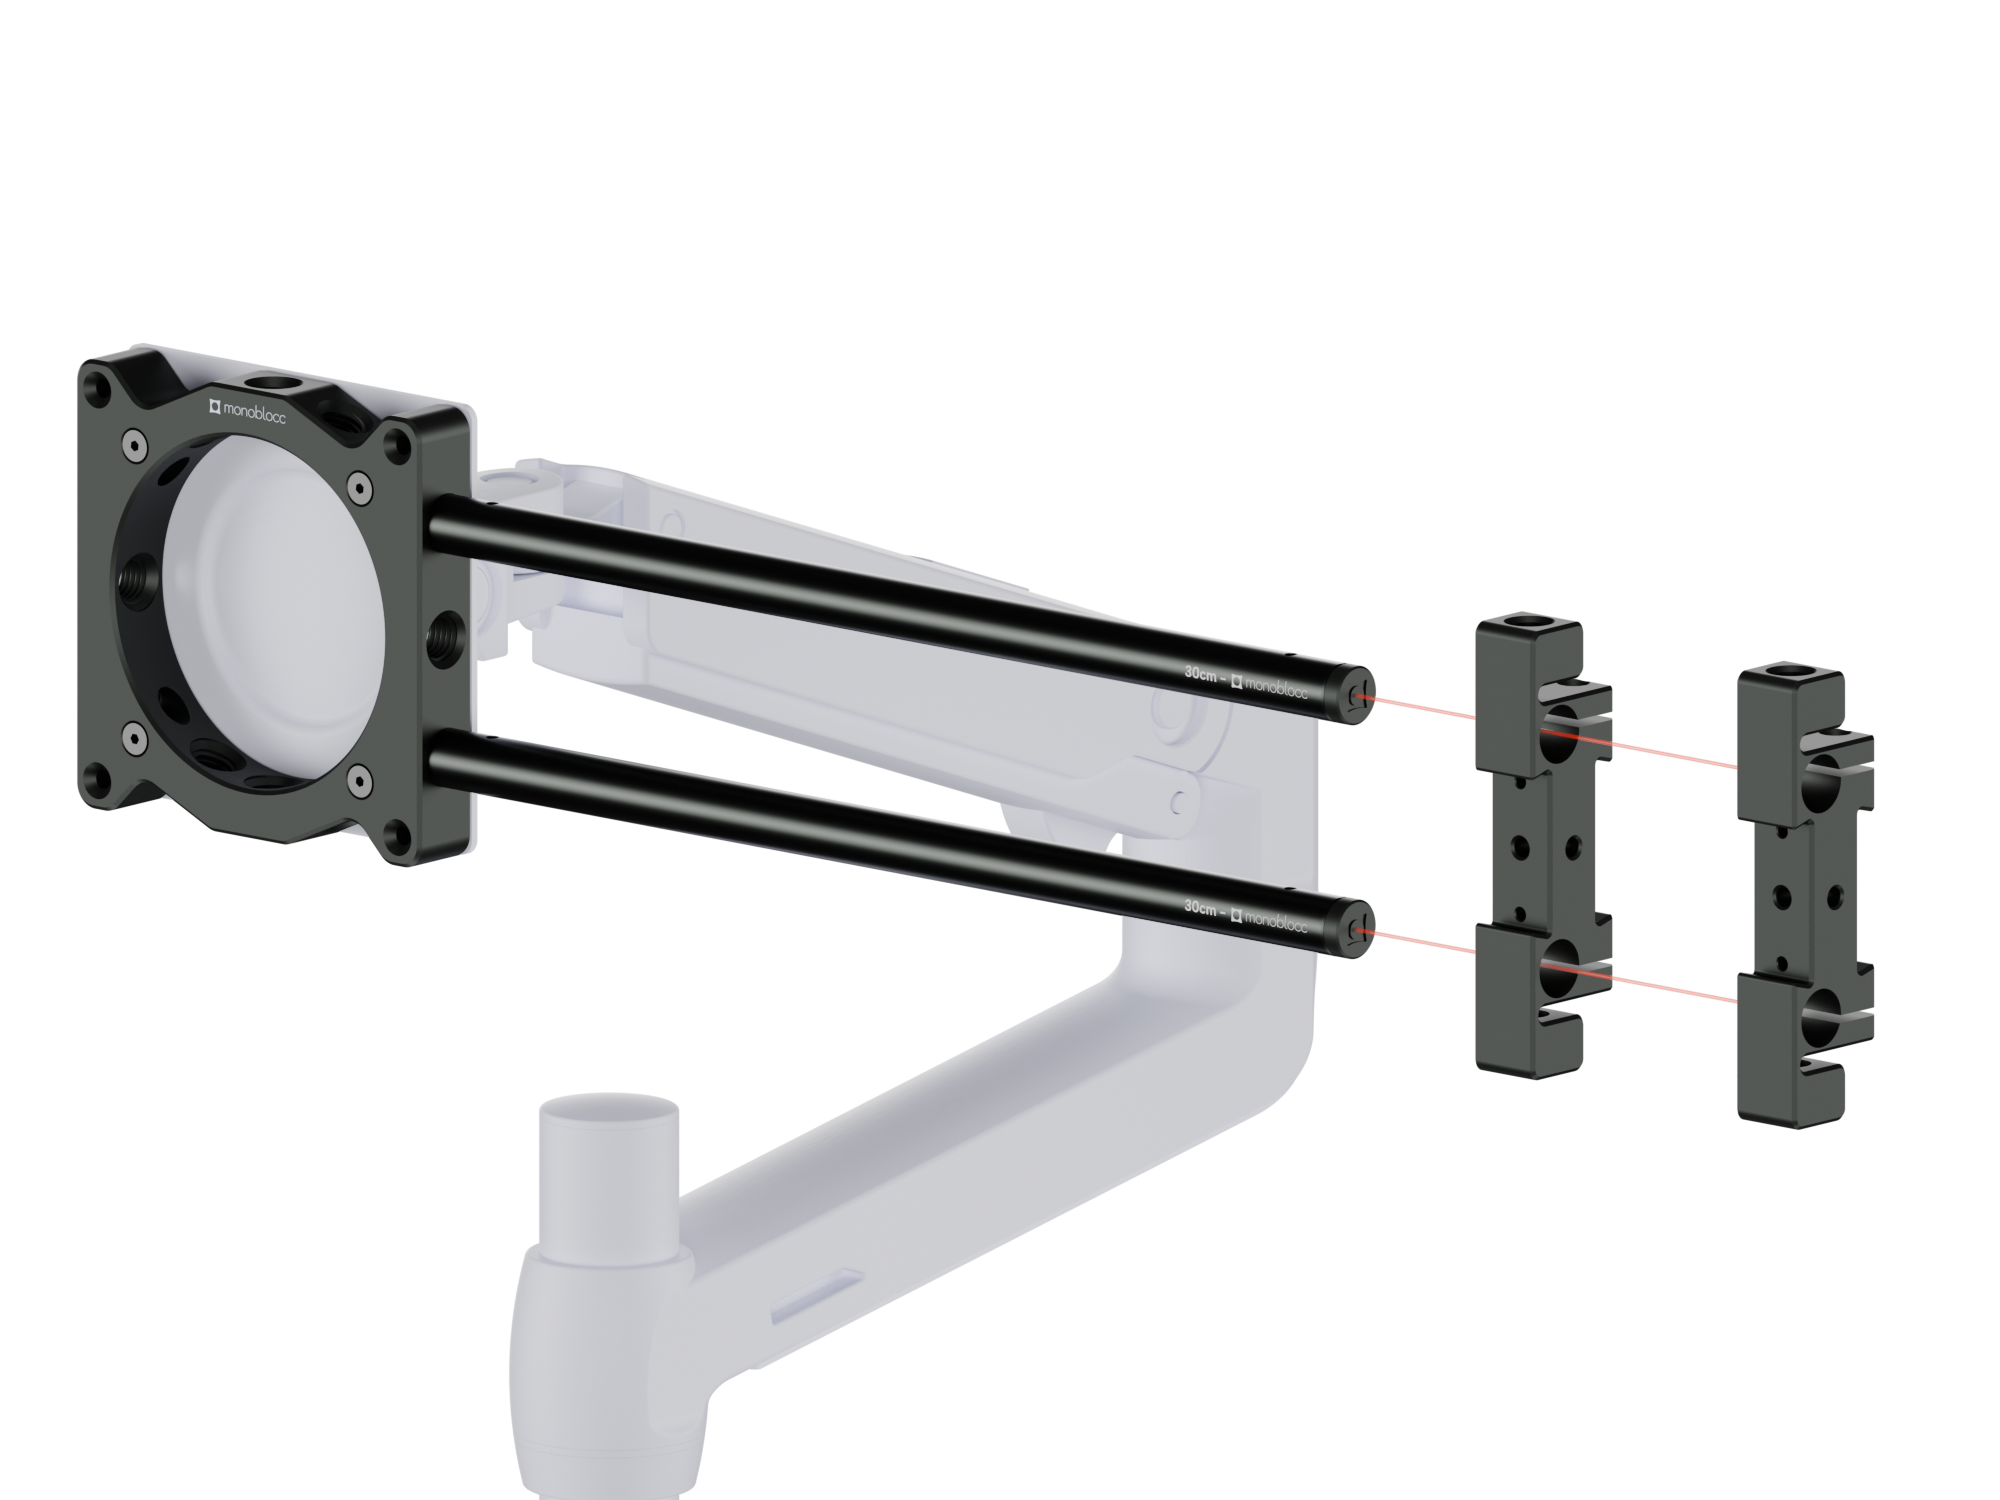
Slide your rod clamps onto your rods. If you have already added your 16mm clamping screws, make sure they are loose enough.


You can face your rod clamps in either direction according to your preferences. Make sure there is enough room for your monitor's back features to clear your rod clamps safely. 

STEP 4: Tighten the clamping screws

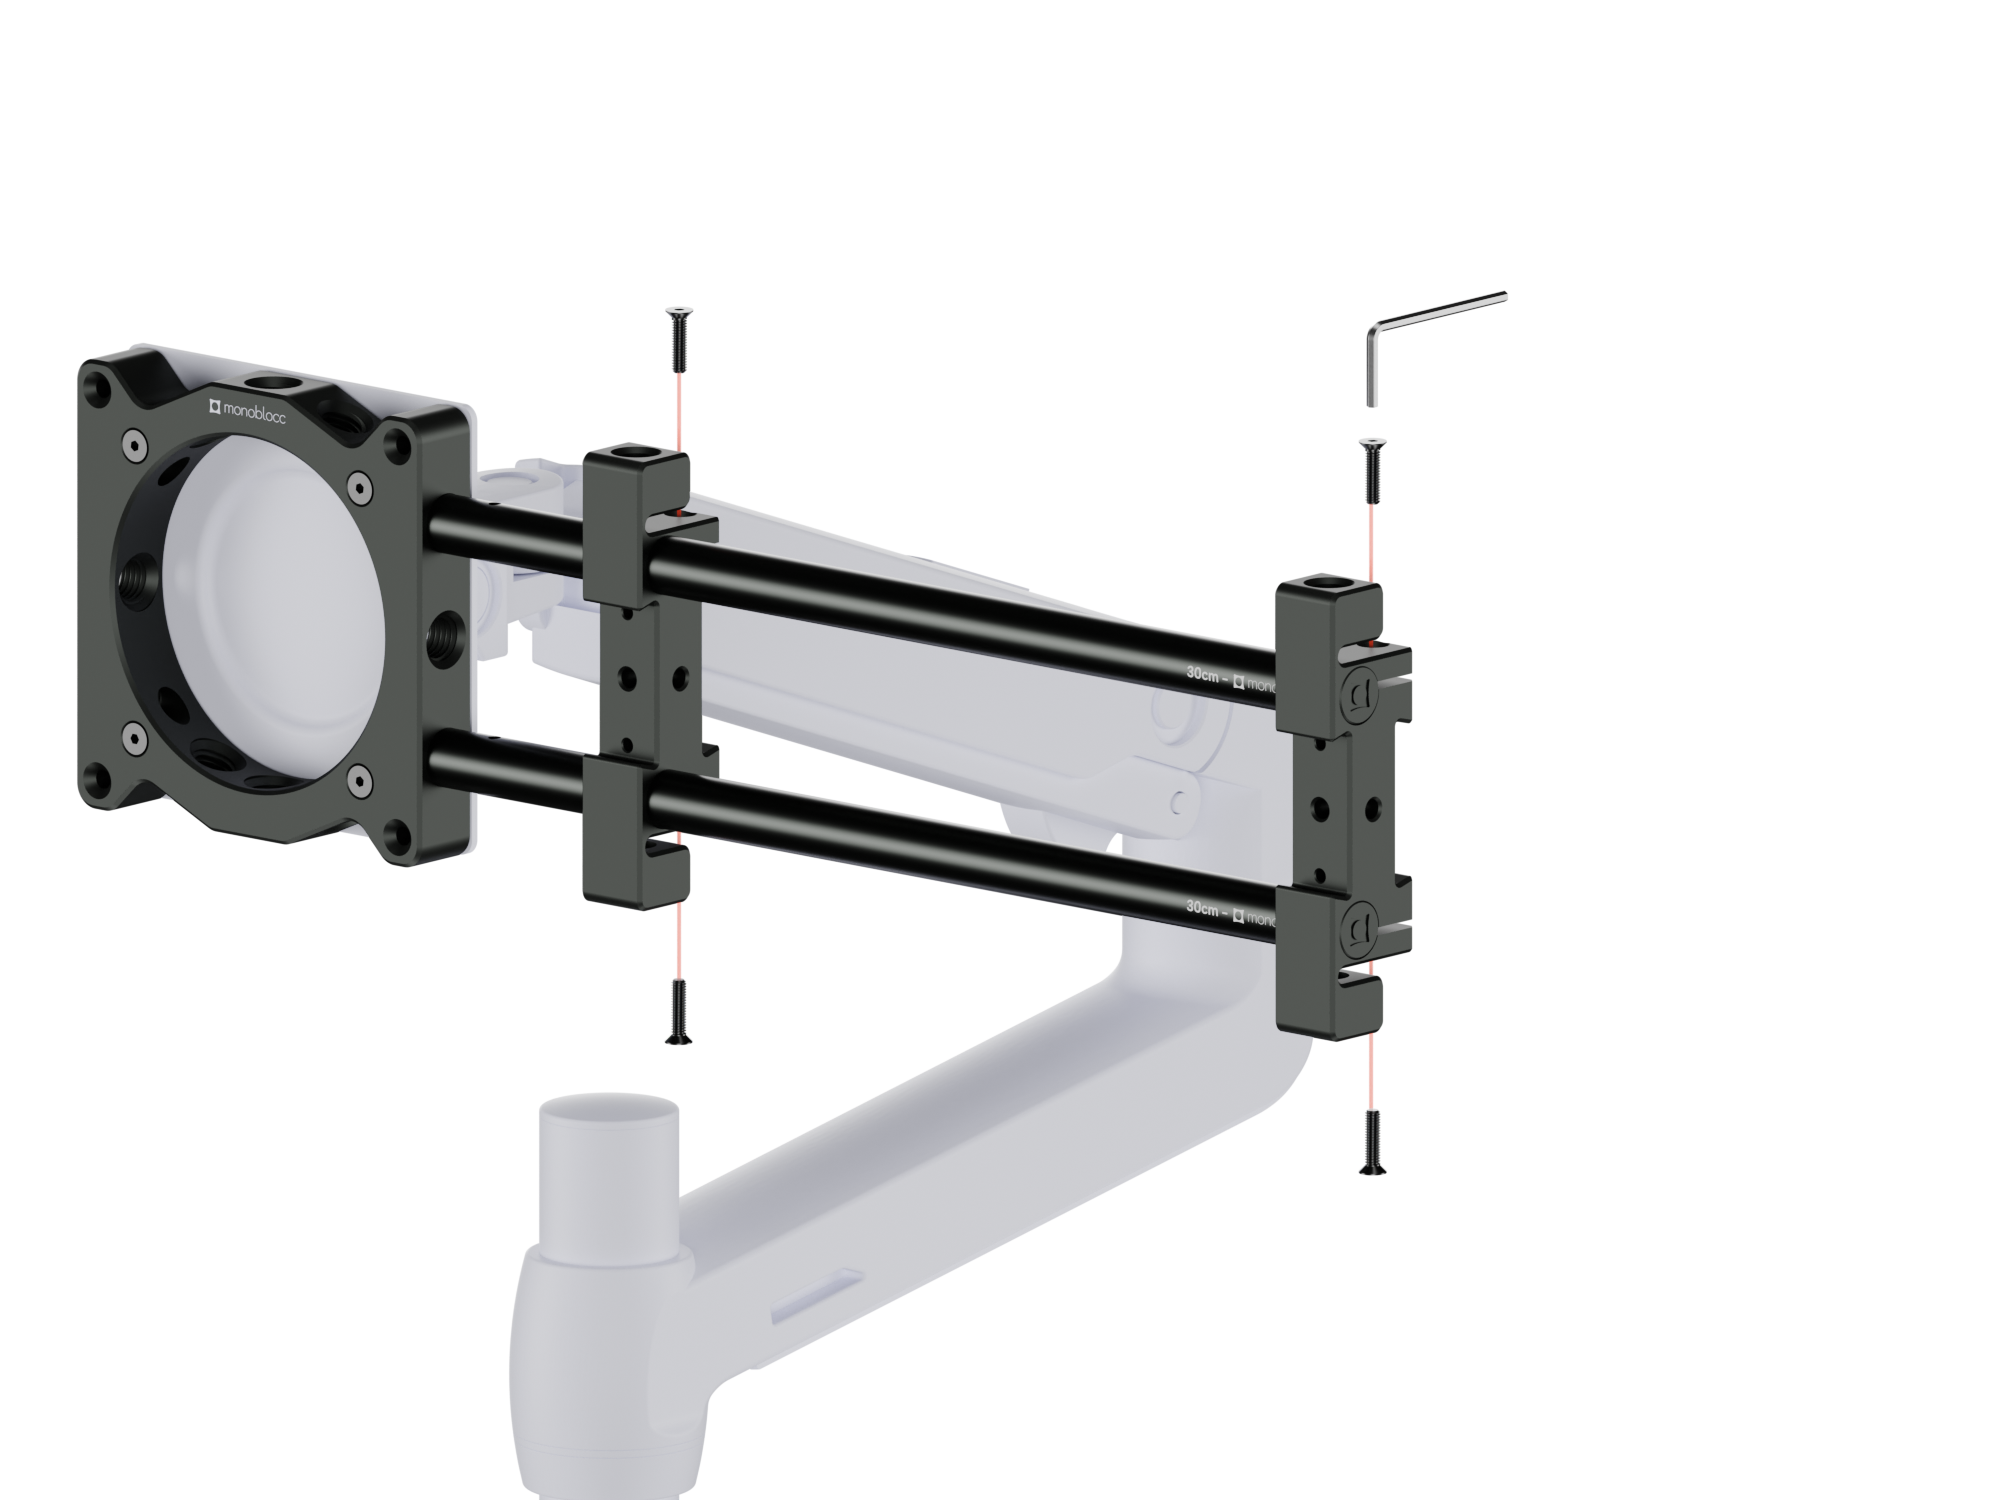
Using the supplied 2.5mm allen key, screw in the the 16mm M4 clamping screws. Ensure a firm tighteness without over-tightening. The clamping screws are integral to the doulbe rod's torsional regidity.

Using the supplied 2.5mm allen key, screw in the the 16mm M4 clamping screws. Ensure a firm tighteness without over-tightening. The clamping screws are integral to the doulbe rod's torsional regidity.

STEP 5: Add your cheese plate

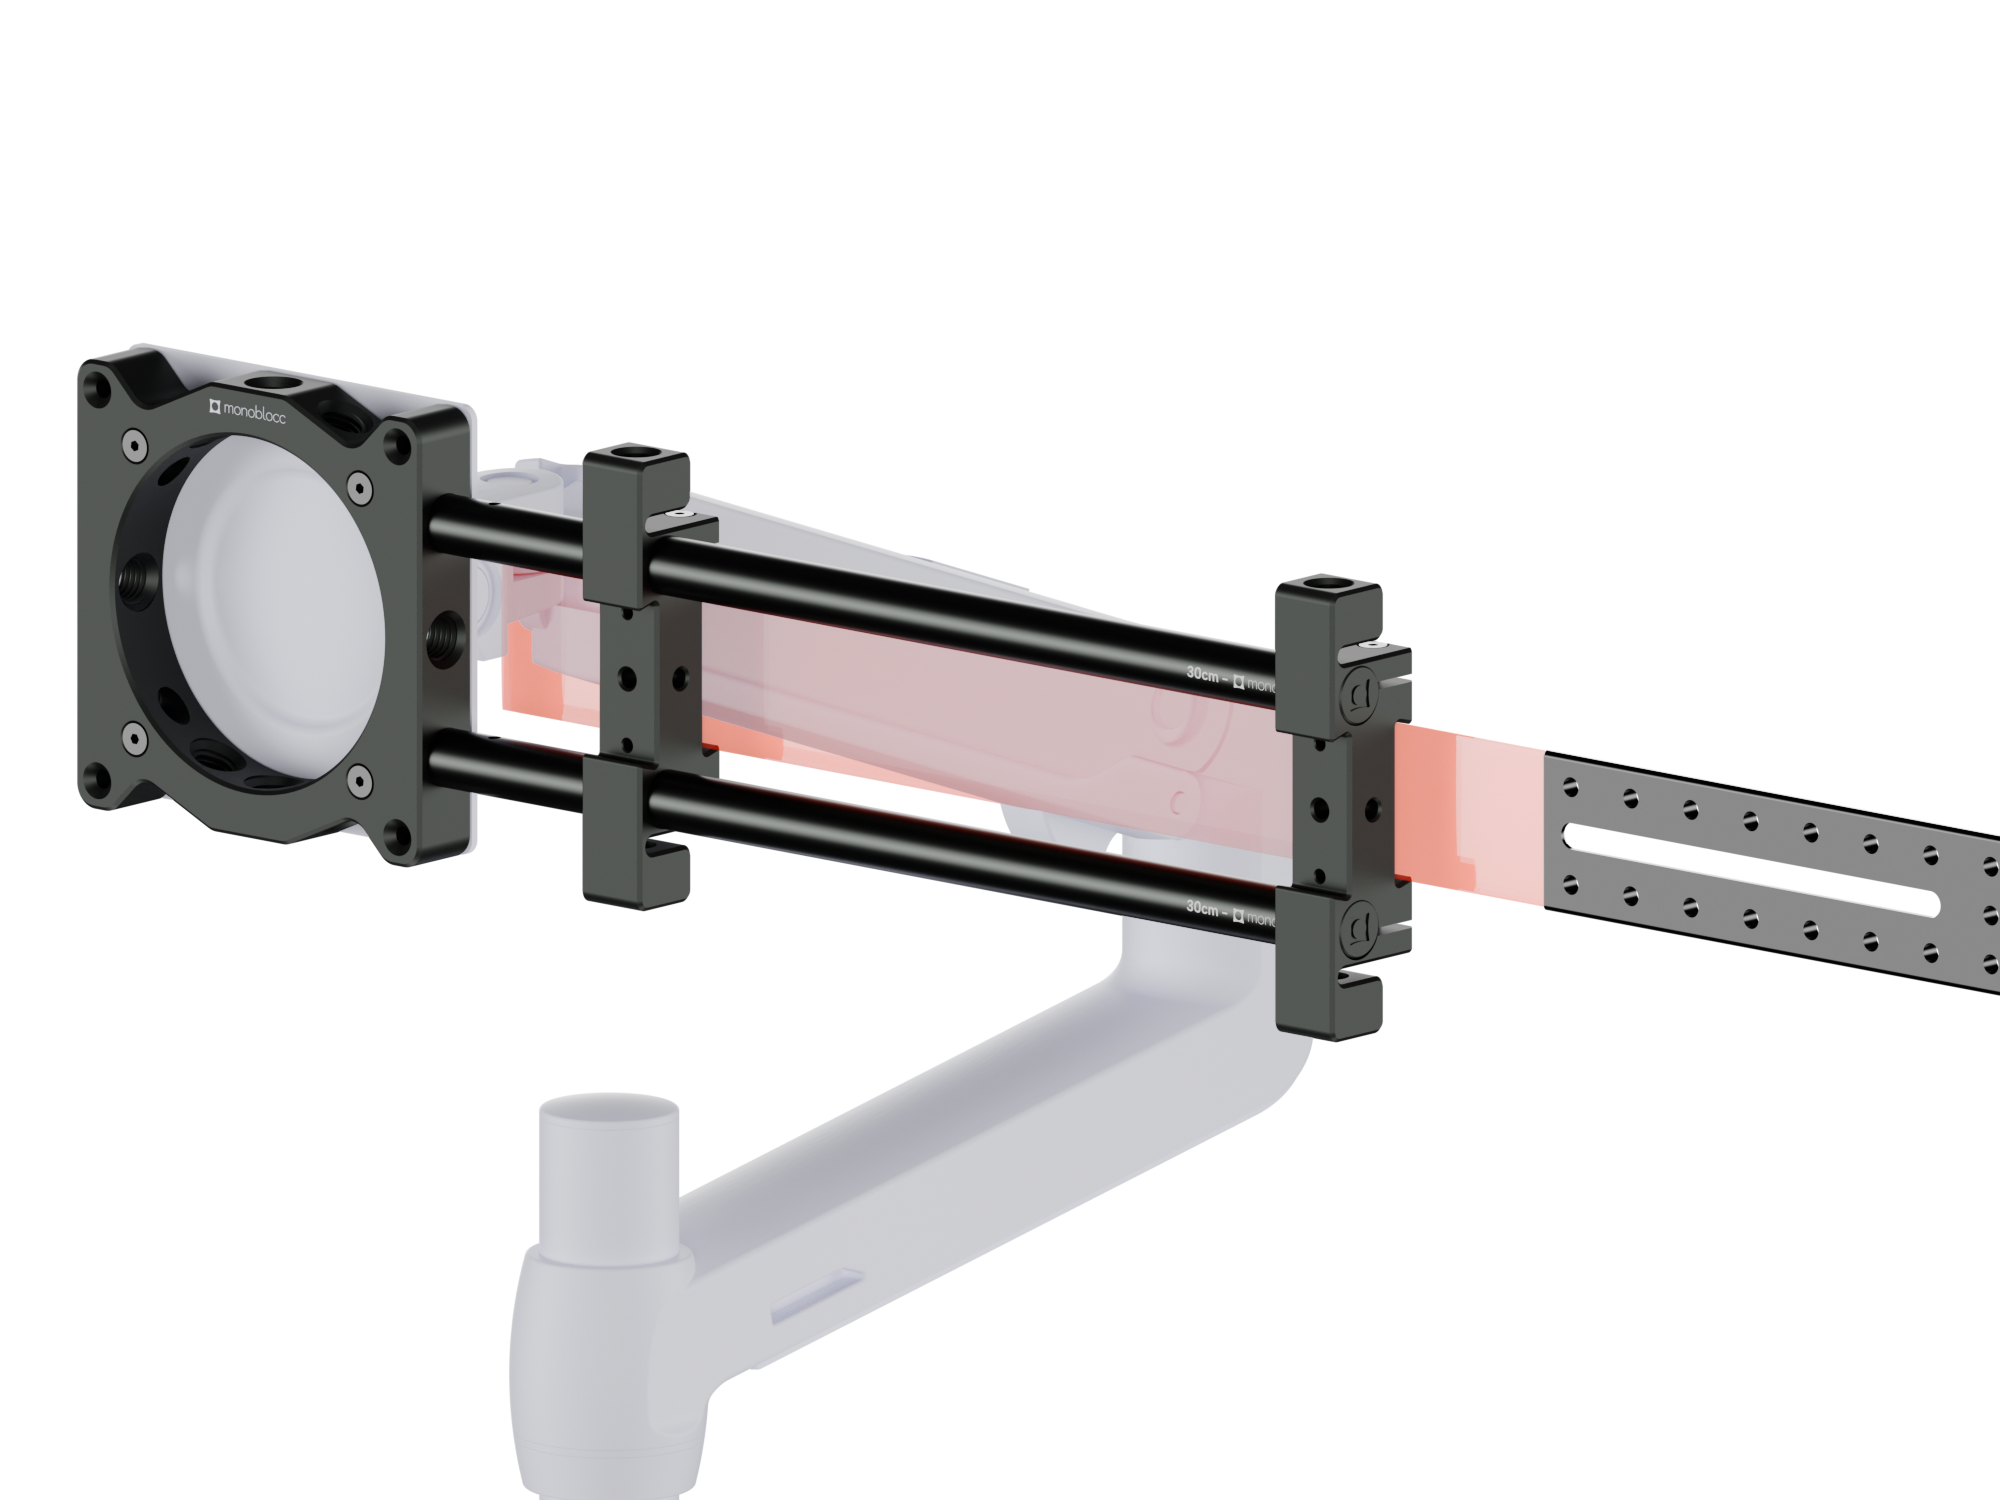
Slide your cheese plate into your rod clamps. You can use the front or back positioning on the rod clamps to your liking.

Slide your cheese plate into your rod clamps. You can use the front or back positioning on the rod clamps to your liking.

STEP 6: Tighten the cheese plate screws
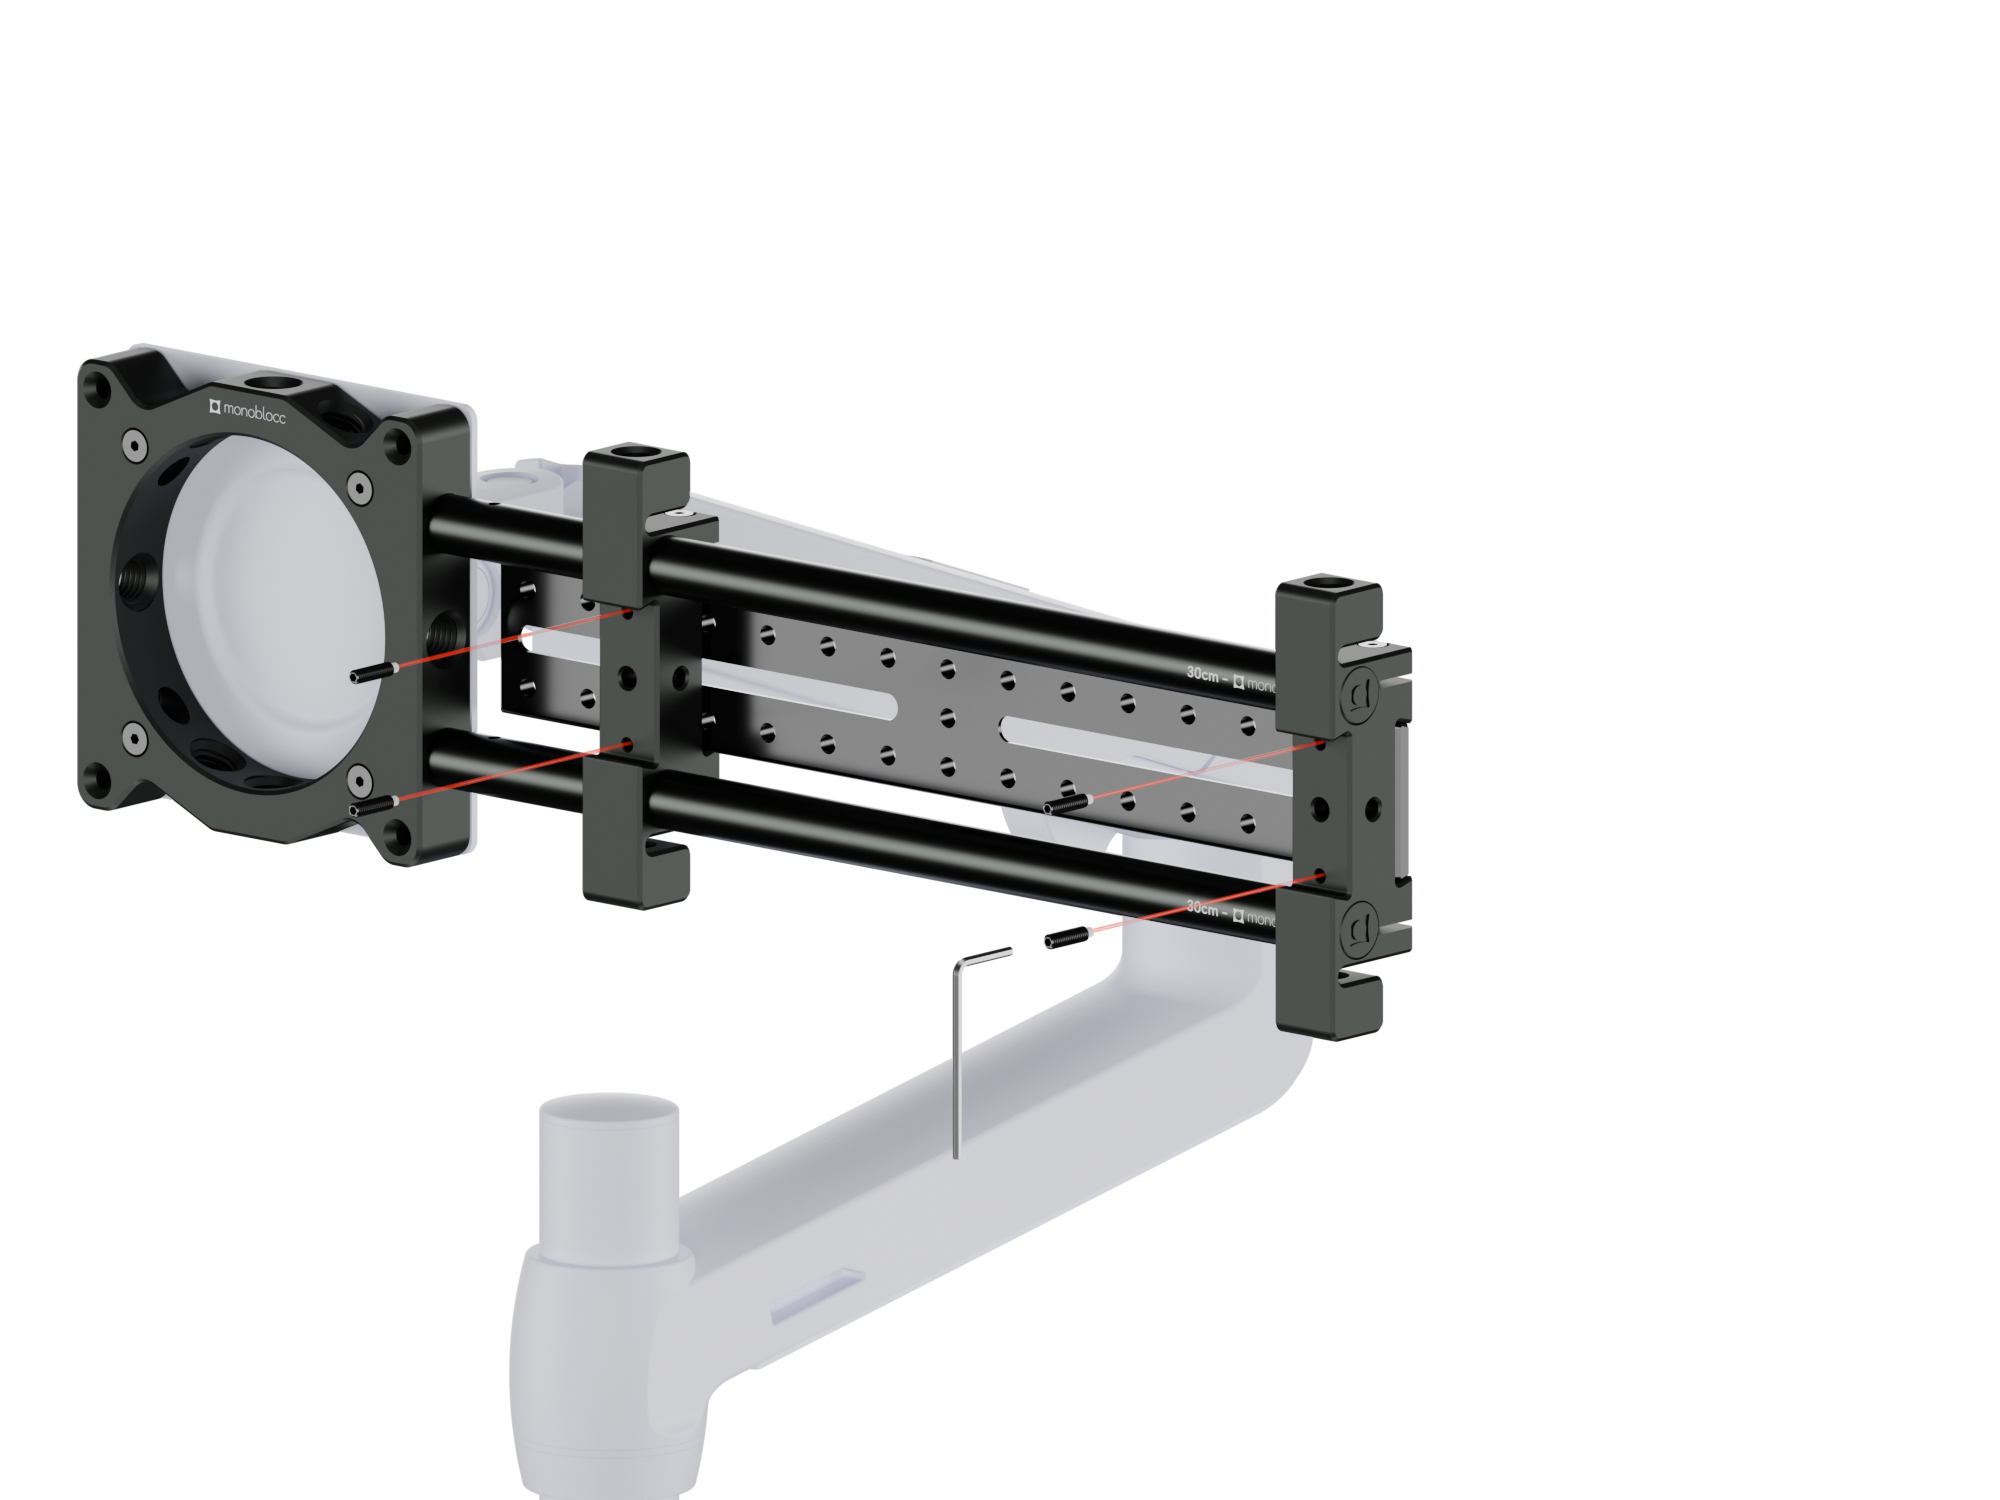
Using the supplied 2mm allen key, screw in and tighten your cheese plate against the rod clamp's dove tail. The white nylon tips of the grub screws ensure a firm grip without bruising the cheese plate's annodisation. Permanent compression of the nylon material is normal.

Using the supplied 2mm allen key, screw in and tighten your cheese plate against the rod clamp's dove tail. The white nylon tips of the grub screws ensure a firm grip without bruising the cheese plate's annodisation. Permanent compression of the nylon material is normal.

STEP 7: Position your magic arm

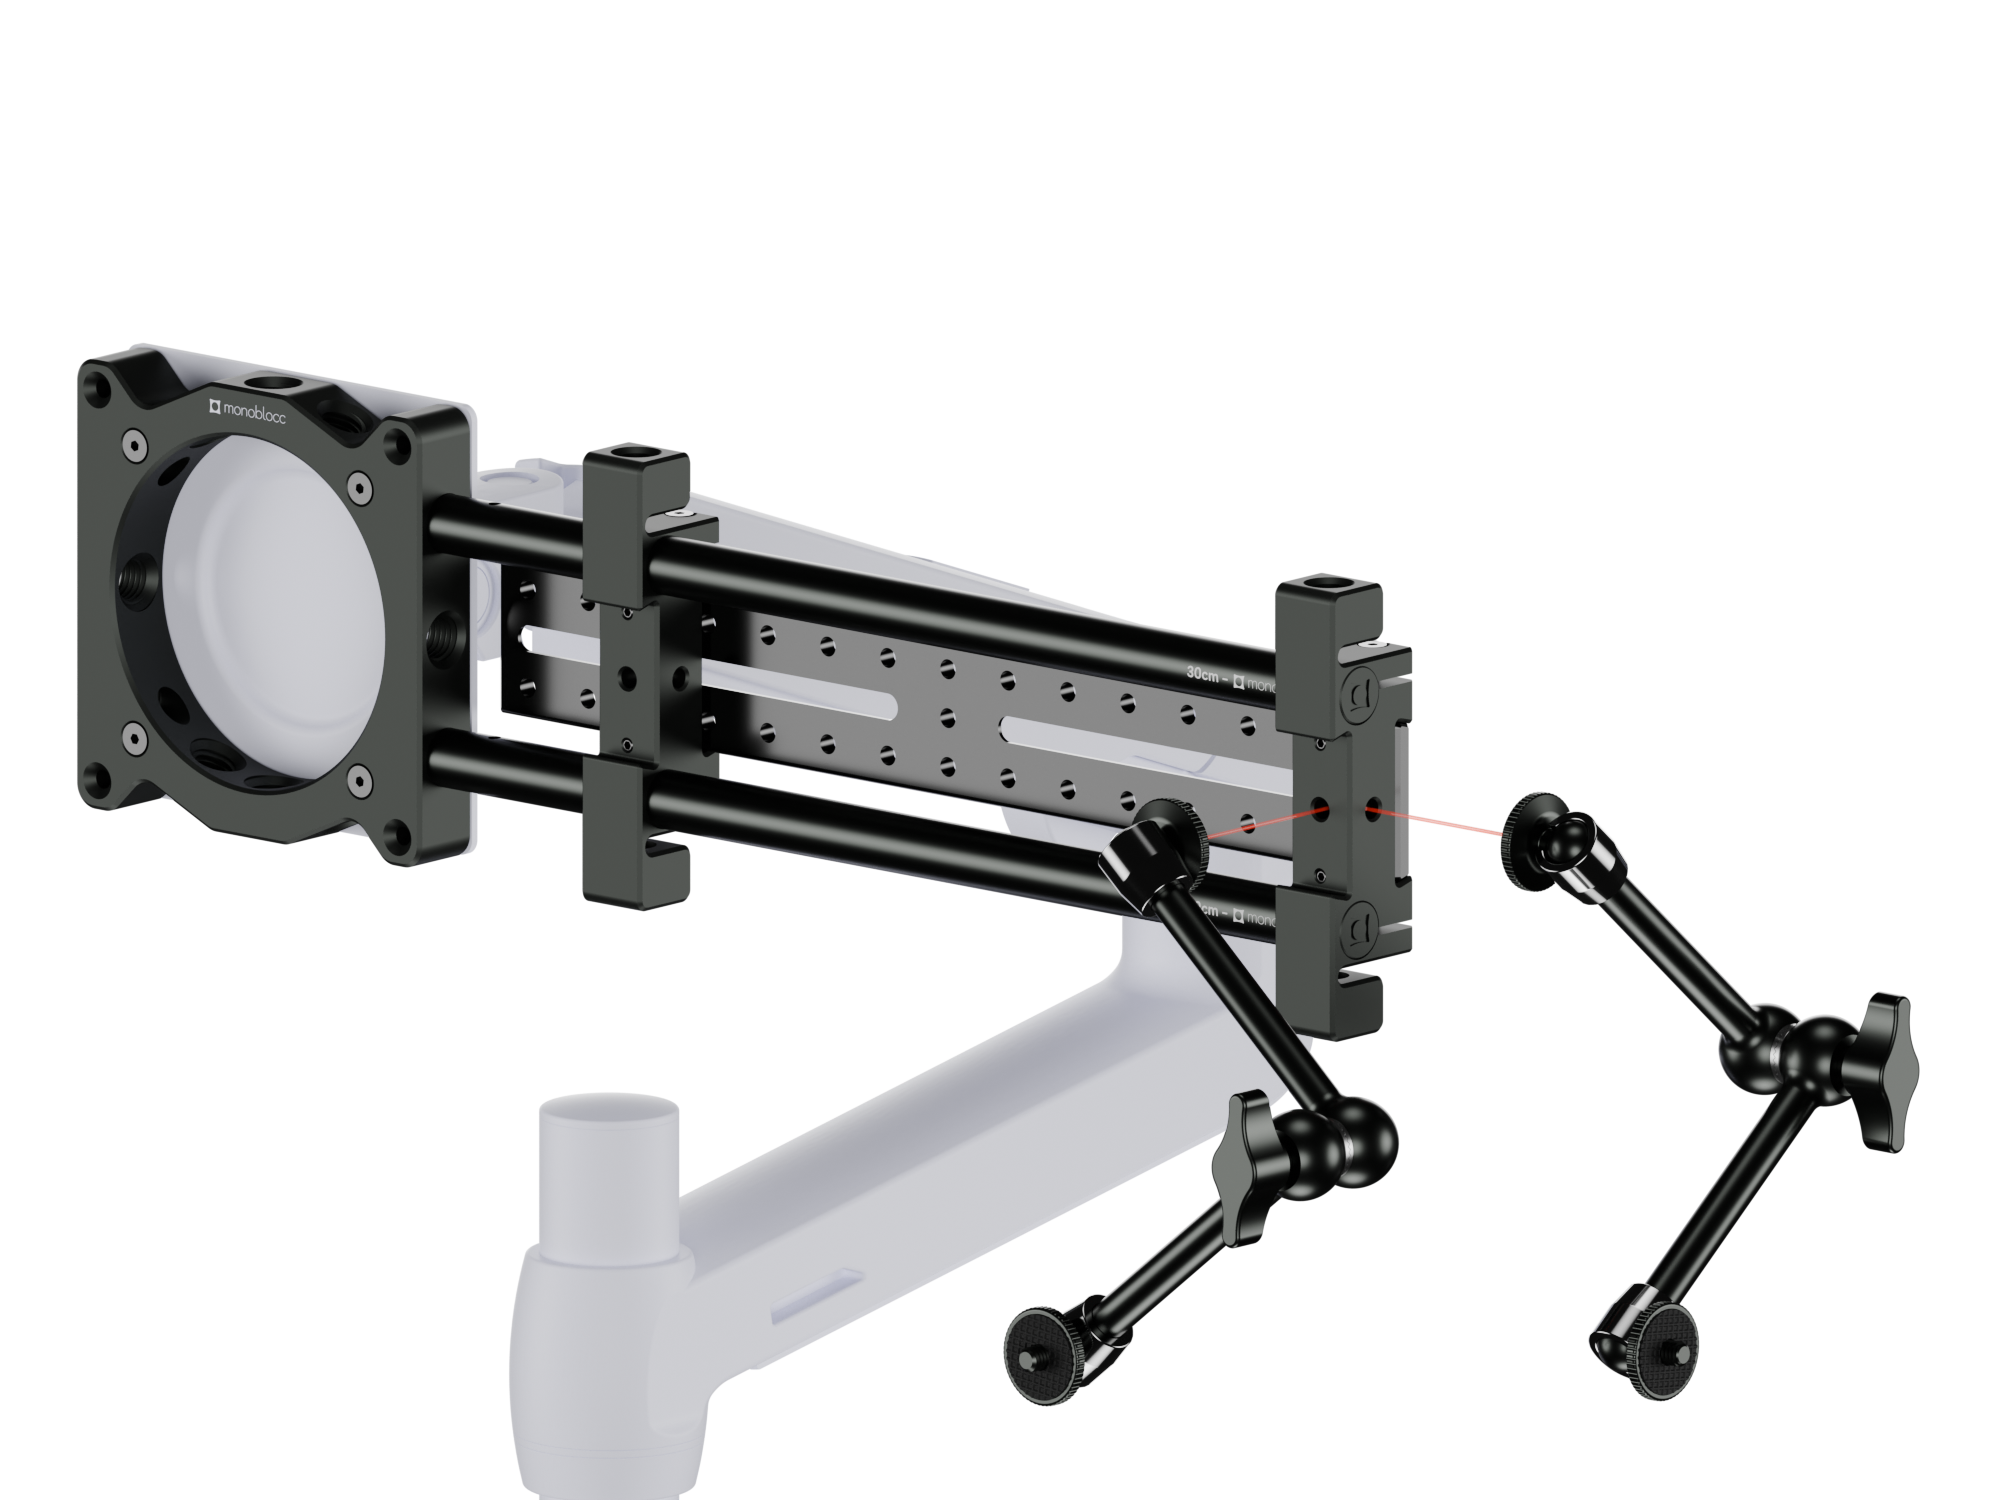
The included magic arm can be attached to any of the 1/4"-20 threads of your rod clamps or cheese plate. Alternatively a M12 to 1/4"-20 connector can be used to mount a magic arm to the M12 rod connectors of your rod clamp.

The included magic arm can be attached to any of the 1/4"-20 threads of your rod clamps or cheese plate. Alternatively a M12 to 1/4"-20 connector can be used to mount a magic arm to the M12 rod connectors of your rod clamp.